How To Create a Website

A Step-By-Step Guide To Create a WordPress Website in 7 Easy Steps

Creating a website with WordPress has become increasingly popular due to its user-friendly interface and extensive customization options. With step-by-step guidance, you can set up your WordPress site efficiently. From domain selection to design customization, here’s a comprehensive guide to creating your WordPress website:

Table of contents

– Step 1: Planning Your Website

  • Define Your Purpose
  • Choose a Domain Name

– Step 2: Setting Up WordPress

  • Choose a Hosting Provider
  • Install WordPress

– Step 3: Customizing Your Website

  • Login to Your WordPress Dashboard
  • Select a Theme
  • Install Essential Plugins

– Step 4: Creating Content

  • Add Pages and Posts
  • Customize Menus and Widgets

– Step 5: Optimization and Security

  • SEO Optimization
  • Security Measures

– Step 6: Launching Your Website

  • Preview and Test
  • Launch Your Site

– Step 7: Maintenance and Growth

  • Regular Updates
  • Analytics and Optimization
  • Content Creation and Engagement

Conclusion

Step 1: Planning Your Website

Define Your Purpose:

1. Identify Primary Objectives

  • Clarity and Focus: Define the main objective of your website. Is it to inform, entertain, sell products, showcase work, or provide services?
  • Target Audience: Understand your target audience and their needs. Tailor your content and design to resonate with them effectively.

2. Content Strategy:

  • Content Types: Determine the types of content you’ll offer—blog posts, articles, videos, portfolios, product listings, or a combination.
  • Value Proposition: Clarify the unique value you’re offering to visitors. What sets your website apart and why should users engage with it?

3. Monetization or Conversion Strategy

  • Business Goals: If it’s a business site or an online store, define your revenue streams or conversion goals—sales, leads, subscriptions, etc.
  • Call to Action (CTA): Plan the desired actions visitors should take—making a purchase, signing up for a newsletter, contacting you, etc.

Choose a Domain Name:

1. Reflective of Brand or Purpose:

  • Brand Alignment: Select a domain name that resonates with your brand identity or the purpose of your website. It should reflect your business name or the main topic of your site.
  • Memorability and Relevance: Aim for a memorable and easy-to-spell domain name. Avoid complex spellings or hyphens that may confuse or deter users.
  • Keyword Integration: If possible, include relevant keywords in your domain name to improve search engine visibility and help users understand your website’s focus.

To assist you with the assignment, you can utilize domain name generators such as DomainWheel, and BusinessNameMaker.

Utilize Domain Wheel, a complimentary website name generator, to generate additional concepts if you seek inspiration. Enter a keyword associated with your niche, and the tool will provide an abundance of suggestions to spark your creativity.

Domain Name Generator

2. Domain Extension and Availability:

  • Extension Selection: Choose a domain extension (.com, .org, .net, etc.) that suits your website’s purpose and audience. The .com extension is commonly preferred and more familiar to users.
  • Availability Check: Verify the availability of your desired domain name. Use domain registration platforms or registrars to search for available names and secure your chosen domain.

3. Long-Term Considerations:

  • Scalability: Select a domain name that allows for future growth or expansion of your website without restricting your scope.
  • Brand Identity: Ensure the domain name aligns with your brand’s identity and long-term vision, as changing it later may impact brand recognition and SEO.

4. Validation and Finalization:

  • Feedback and Validation: Seek feedback from peers or potential users about your chosen domain name and website objectives to ensure they resonate well and align with expectations.
  • Domain Registration: Once you’ve finalized your domain name, register it through a reputable domain registrar to secure its ownership.

Careful planning and thoughtfully selecting your website’s purpose and domain name are pivotal in establishing a strong foundation for your WordPress site. These decisions lay the groundwork for your website’s overall direction, branding, and identity.

Step 2: Setting Up WordPress

Choosing a Hosting Provider:

  • Assess Your Needs: Consider your website’s size, expected traffic, and required resources. Different hosting providers offer various plans tailored to different needs—shared hosting for beginners, VPS (Virtual Private Server) for scalable resources, and dedicated hosting for high-traffic websites.
  • Evaluate Reliability and Uptime: Look for providers with a track record of high uptime (the time your site is accessible) and reliable customer support. Read reviews and consider factors like server speed, reliability, and customer service responsiveness.
  • Check Features and Resources: Assess the hosting plans for features like storage, bandwidth, email accounts, SSL certificates, backups, and scalability options. Ensure the chosen plan meets your current requirements and allows room for future growth.
  • Compare Pricing and Plans: While cost is a factor, don’t compromise on quality for a lower price. Compare the pricing structures of different providers against the features they offer to find the best value for your budget.

How do I choose a Web Hosting Provider?

“In our long-term review of best web hosting providers, Hostinger emerged as a leader in affordability and reliability.”

Hostinger offers web hosting solutions suitable for various needs, from personal blogs to growing businesses. They emphasize affordability with plans starting at just $2.99 per month. You’ll get essential features like a free domain name, SSL certificate, email hosting, and 24/7 customer support.

Disclaimer: We are not affiliated with Hostinger and this is not a sponsored recommendation. This information is based on publicly available data and reviews. It’s always best to research and compare options before making a decision.

Learn How to Purchase Web Hosting From Hostinger
How to Purchase Web Hosting from Hostinger: A Step-by-Step Guide

Launching a website is exciting, but choosing the right web hosting provider can be overwhelming. This guide will walk you through purchasing web hosting from Hostinger, a popular and affordable option for beginners and established website owners alike.

Step 1: Visit Hostinger’s Website
Go to Hostinger’s official website by typing www.hostinger.com into your web browser’s address bar and hitting enter.

Step 2: Choose Your Hosting Plan
Once on the Hostinger homepage, you’ll see a variety of hosting plans to choose from.

  • Shared Hosting: Affordable option for small websites and blogs.
  • Cloud Hosting: More power and scalability for growing websites.
  • VPS Hosting: Dedicated resources for high-traffic websites.
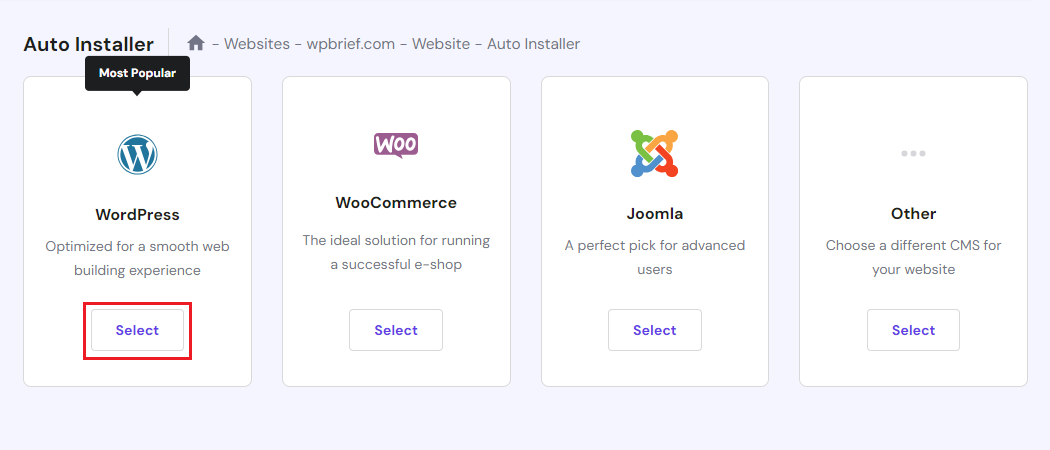
  • WordPress Hosting: Optimized for WordPress websites.

In this guide, we’ll select the premium plan that best suits your needs by clicking on the “Add to Cart” button.

Choose a Plan

Bonus Tip: Consider factors like website traffic, expected growth, and technical knowledge when choosing a plan. You can compare plans and specifications directly on Hostinger’s website.

Step 3: Select Your Billing Period
Next, choose your billing period. Hostinger offers flexible billing periods ranging from 1 month to 48 months. Select the one that works best for you. Choose a period

Bonus Tip: Longer periods come with significant discounts, but choosing a shorter duration allows for more flexibility if you’re unsure about your long-term commitment.

Step 4: Create Your Account
You can either create a new Hostinger account using your email address or social media login (Facebook, Google). Be sure to choose a strong password. Create your account

Step 5: Enter Your Billing Information
Select your preferred payment method (credit card, PayPal, etc.) and enter the required details including your first and last name, email address, and any other requested details. Double-check for accuracy before finalizing the purchase. Select method

If you have a coupon code, you can enter it in the “Coupon Code” box to apply the discount. Coupon Code

Step 6: Complete Your Purchase
Once you’re satisfied with your order, click on the “Submit Secure Payment” button to complete your purchase. Hostinger will send you a confirmation email with your account details and login information

Step 7: Verify Your Account
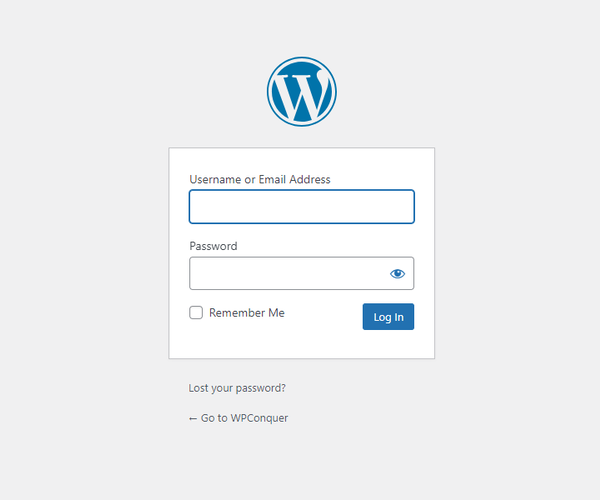
After completing the payment, you’ll receive an email verification link. Click it to activate your account and access your hosting panel.

Additional Tips:
  • Use a coupon code for additional discounts (often available online).
  • Consider purchasing extras like SSL certificates and backups for increased security and peace of mind.
  • Take advantage of Hostinger’s 24/7 customer support if you encounter any issues.

By following these steps, you can purchase web hosting from Hostinger and start building your website quickly and easily. Remember to choose a plan that fits your needs and budget, and don’t hesitate to reach out to Hostinger’s support team if you have any questions.

Installing WordPress:

  • Access the Hosting Control Panel: After purchasing a hosting plan, access your hosting account’s control panel (usually provided via a link or login credentials).
  • Locate the One-Click WordPress Install: Most hosting providers offer a user-friendly interface with a one-click installation option for WordPress. Look for an icon or section labeled “WordPress” or “One-Click Installs” within the control panel.

Installing apps on Hostinger is a breeze! Just head to Websites → Manage and find the “Auto Installer” on the left.

Hostinger CPanel
  • Initiate the Installation: Click on the WordPress icon or Auto installer option. You’ll likely be prompted to select your domain (if you have multiple) where you want to install WordPress.
Auto Installer
  • Configure Installation Settings: Enter the required information, such as your website name, admin username, and password. Some providers may also allow you to select optional settings during the installation.
  • Complete the Installation: Once you’ve filled in the necessary details, initiate the installation process. The hosting provider’s system will automatically set up the WordPress files and database on your chosen domain.
  • Accessing Your WordPress Dashboard: After installation, you can access your WordPress admin dashboard by visiting www.yourdomain.com/wp-admin and logging in with the admin credentials you set during the installation process.
WordPress Dashboard

Additional Tips:

  • Opt for Manual Installation: If your hosting provider doesn’t offer a one-click installation or if you prefer a manual setup, WordPress.org provides comprehensive installation guides. This involves downloading the WordPress files from their website and uploading them to your hosting server via FTP.
  • Keep Credentials Secure: Ensure to keep your WordPress admin login credentials secure. Consider using a strong password and avoid using ‘admin’ as the username for security reasons.

Selecting the right hosting provider and correctly installing WordPress are foundational steps in building your website. Taking the time to choose a reliable host and understanding the installation process can significantly impact your website’s performance and stability.

Step 3: Customizing Your Website

Logging into Your WordPress Dashboard:

  • Accessing the Backend: Open your web browser and type “www.yourdomain.com/wp-admin” into the address bar. This URL will take you to the login page of your WordPress website’s backend.
WordPress Login
  • Entering Credentials: Input the username and password you set during the WordPress installation process. Upon successful login, you’ll enter the WordPress dashboard, which is the control center for managing your website’s content and settings.

Selecting a Theme:

  • Understanding Themes: WordPress offers a vast array of themes that control your website’s appearance and layout. Navigate to “Appearance” > “Themes” in the WordPress dashboard to access the themes library.
Add Theme
  • Choosing a Theme: Explore the available themes categorized as free or premium options. Consider factors such as design aesthetics, responsiveness across devices, customization options, and compatibility with necessary plugins.
Choosing a Theme
  • Customization and Preview: Many themes allow you to customize colors, fonts, layouts, and more. Utilize the “Live Preview” feature to see how your content would look with different themes before making a final selection.
  • Installing the Theme: Once you’ve chosen a theme, click the “Install” button and then “Activate” to apply it to your website. You can always switch between themes or modify their settings later.
Theme Details

Installing Essential Plugins:

  • Accessing Plugins Section: In the WordPress dashboard, navigate to “Plugins” > “Add New” to explore and install plugins.
Add New Plugins
  • Search and Install: Use the search bar to find specific plugins, such as “Yoast SEO,” “Contact Form 7,” “Wordfence Security,” or “WP Rocket.” Click on “Install Now” next to each plugin you want to add.
  • Activation and Configuration: Once installed, click on the “Activate” button. For each plugin, follow the provided setup wizard or navigate to its settings within the dashboard to configure options as per your requirements.
  • Recommended Settings: Configure essential plugin settings, such as adding meta tags and optimizing content for SEO using Yoast SEO, setting up contact forms using Contact Form 7, enhancing security with Wordfence Security, and improving site performance using WP Rocket caching.
  • Regular Updates: Keep plugins updated to their latest versions to benefit from new features, bug fixes, and security patches. WordPress notifies you when updates are available.

Additional Tips:

  • Plugin Selection: While there are thousands of plugins available, refrain from installing too many, as they can slow down your site or create conflicts. Choose plugins carefully, focusing on essential functionalities initially.
  • Quality Assurance: After installing themes and plugins, ensure your website functions correctly by navigating through different pages, testing forms, and checking for any design or functionality issues.

Customizing your WordPress website with a suitable theme and essential plugins lays the foundation for its appearance, functionality, and performance. Regularly updating themes, and plugins, and monitoring their impact on your site’s performance ensures a smooth and optimized user experience.

Step 4: Creating Content

Adding Pages and Posts:

1. Creating Pages:

  • Homepage: Craft an engaging homepage that introduces visitors to your website’s purpose or services. You can use a combination of text, images, and multimedia elements.
  • About Page: Share information about yourself, your brand, or your company. Use this page to build credibility and establish a connection with your audience.
  • Contact Page: Provide contact information or a contact form for visitors to reach out to you. Consider including a map, social media links, or other relevant details.
  • Blog Page: If your website includes a blog, create a dedicated page where visitors can access your latest posts.

2. Writing and Publishing Posts

  • Topic Relevance: Write blog posts that align with your website’s niche or purpose. Offer valuable and engaging content that resonates with your target audience.
  • Consistency: Develop a content schedule and aim for regular posting to keep your audience engaged. Use a mix of text, images, videos, or infographics to diversify content formats.
  • SEO Optimization: Utilize SEO best practices within your posts. Incorporate relevant keywords, write compelling meta descriptions, and optimize headings for search engines.

Customizing Menus and Widgets:

1. Creating Menus

  • Menu Structure: Go to “Appearance” > “Menus” in the WordPress dashboard to create and customize menus. Arrange pages, categories, or custom links to form a structured navigation menu.
  • Primary Navigation: Designate your primary menu to include essential pages like Home, About, Contact, and Blog. Consider dropdowns for subpages or categories to enhance user navigation.

2. Adding Widgets

  • Understanding Widgets: Widgets are elements that add functionality or content to specific areas of your website, such as sidebars or footers.
  • Widget Areas: Access “Appearance” > “Widgets” to manage and add widgets to different sections of your site. Common widgets include recent posts, search bars, social media feeds, and subscription forms.
WordPress Widgets
  • Tailoring Widgets: Choose widgets that complement your site’s objectives. For instance, display a subscription form widget in the sidebar to encourage newsletter sign-ups or showcase popular posts to increase engagement.

Additional Tips:

  • Responsive Design: Ensure your pages and posts are mobile-friendly and responsive across various devices. Preview and test your content on different screen sizes to guarantee a consistent user experience.
  • Visual Appeal: Incorporate high-quality images, graphics, and multimedia content to enhance the visual appeal of your pages and posts. Optimize media files to maintain site speed.
  • Engagement Elements: Consider integrating social media sharing buttons within posts, enabling comments, or adding a call-to-action (CTA) to encourage user interaction and engagement.

Balancing compelling content creation with intuitive site navigation significantly contributes to a positive user experience. Regularly update and refine your content strategy and navigation structure to meet the evolving needs of your audience.

Step 5: Optimization and Security

SEO Optimization:

1. Implementing SEO Plugins

  • Yoast SEO: Install and activate plugins like Yoast SEO to assist in optimizing your content. This tool provides guidance on keyword usage, readability, meta tags, and content structure.
  • Keyword Optimization: Research and integrate relevant keywords naturally within your content, including titles, headings, and body text. Avoid overstuffing keywords; aim for a natural flow.
  • Meta Descriptions: Craft compelling meta descriptions that summarize each page’s content and entice users to click through from search engine results pages (SERPs).

2. Content Optimization

  • Quality Content: Create informative, engaging, and valuable content for your audience. Focus on providing solutions, insights, and relevant information that aligns with users’ search intents.
  • Readability and Structure: Use descriptive headings, bullet points, and short paragraphs to enhance readability. Break content into digestible sections for easy comprehension.

3. Site Performance

  • Speed Optimization: Ensure your website loads quickly. Optimize images, use caching plugins like WP Rocket, and choose a reliable hosting provider to improve site speed.
  • Mobile Responsiveness: Ensure your website is mobile-friendly and offers a seamless user experience across different devices.

Security Measures:

1. Regular Updates

  • WordPress Core, Themes, and Plugins: Keep all website elements updated to their latest versions. Regular updates often include security patches that protect your site from vulnerabilities.

2. Strong Authentication

  • Secure Passwords: Use strong, unique passwords for your WordPress admin, FTP, and hosting accounts. Avoid using easily guessable passwords and consider using password managers.
  • Two-Factor Authentication (2FA): Enable 2FA for an additional layer of security, requiring a second form of verification beyond just a password.

3. Security Plugins

  • Firewalls and Malware Scanners: Implement security plugins like Wordfence Security or Sucuri Security to actively monitor your website, detect threats, and block potential attacks.
  • Regular Backups: Set up automated backups of your website to ensure you have a recent copy in case of data loss or security breaches.

4. User Permissions and Access Control:

  • Limit User Access: Assign appropriate user roles with the least privileges required. Admin accounts should be limited to essential users to reduce the risk of unauthorized access.

5. Continuous Monitoring

  • Regular Audits: Periodically audit your website for vulnerabilities, broken links, and outdated content. Fix issues promptly to maintain a healthy and secure website.
  • Monitoring Tools: Use security monitoring tools to receive alerts about suspicious activities, unauthorized logins, or potential threats.

By prioritizing SEO best practices and implementing robust security measures, you enhance your website’s visibility, credibility, and protection against potential risks or threats in the digital landscape. Regularly revisiting and updating these measures will ensure your website remains optimized and secure.

Step 6: Launching Your Website

Preview and Testing:

1. Cross-Device Compatibility

  • Responsive Design Check: View your website across various devices (desktops, laptops, tablets, and smartphones) to ensure it adapts seamlessly to different screen sizes.
  • Browser Compatibility: Test your website on multiple browsers (Chrome, Firefox, Safari, Edge, etc.) to confirm consistent display and functionality across platforms.

2. Functionality Testing

  • Forms and Features: Test all interactive elements, such as contact forms, subscription forms, search bars, and buttons, to ensure they function correctly.
  • Navigation and Links: Verify that all internal and external links work properly and lead to the intended destinations without errors or broken links.

3. Content Review

  • Proofreading: Double-check all written content for spelling mistakes, grammatical errors, and formatting inconsistencies.
  • Image and Media Validation: Ensure all images and multimedia elements display correctly and contribute positively to the overall user experience.

Launching Your Site:

1. Exit Maintenance Mode:

  • Disable Maintenance Pages: If your website was in maintenance mode or had a coming soon page, deactivate it to make your website accessible to visitors.
  • Set Live Status: Make the necessary changes in your WordPress settings or through your hosting provider to set your site live on the internet.

2. Announcing Your Launch:

  • Inform Your Audience: Spread the word about your new website through various channels—social media, newsletters, email lists, and any other platforms where your audience is active.
  • Promotional Efforts: Consider running promotional campaigns or special offers to attract initial traffic and engage your audience.

3. Monitoring Performance

  • Analytics Setup: Integrate analytics tools like Google Analytics to track website traffic, user behavior, and other valuable metrics.
  • Feedback Collection: Encourage visitors to provide feedback on their experience navigating your site. Use this input to make further improvements.

4. Post-Launch Actions

  • Continuous Monitoring: Keep an eye on your website’s performance, user interactions, and any issues that might arise post-launch.
  • Iterative Improvements: Gather feedback, analyze user data, and make iterative improvements to enhance user experience, content quality, and site functionality.

Launching your website is an exciting milestone. Ensuring a seamless and error-free experience for your visitors by thoroughly testing and reviewing your site before the launch is crucial. Once live, actively engage with your audience, monitor site performance, and continually refine your website based on user feedback and analytics.

Step 7: Maintenance and Growth

Regular Updates:

1. WordPress Core, Themes, and Plugins

  • Scheduled Updates: Keep your WordPress core, themes, and plugins up-to-date with the latest versions released by developers. These updates often include security patches, bug fixes, and new features.
  • Automatic Updates: Enable automatic updates wherever possible to ensure timely implementation of critical security fixes.

2. Backup Procedures

  • Scheduled Backups: Implement regular backups of your website’s data and files. Automate this process to ensure you have a recent backup in case of unexpected issues or data loss.

Analytics and Optimization:

1. Analytics Tools Integration

  • Google Analytics: Dive into Google Analytics to track key metrics like traffic sources, user demographics, popular pages, and user behavior (time spent, bounce rates, etc.).
  • Conversion Tracking: Set up conversion tracking to monitor specific actions on your site (e.g., form submissions, and purchases) and optimize for better performance.

2. Optimization Strategies

  • Content Performance Analysis: Identify high-performing content and pages. Analyze user engagement metrics to understand what resonates well with your audience.
  • SEO and Keyword Insights: Utilize analytics data to refine your SEO strategy. Identify keywords driving traffic and optimize content further around those keywords.

Content Creation and Engagement:

1. Regular Content Updates

  • Consistent Posting Schedule: Maintain a regular content schedule to keep your website fresh and relevant. Consider blog posts, articles, videos, infographics, or podcasts based on your audience’s preferences.
  • Quality Content: Focus on creating valuable, insightful, and shareable content that addresses your audience’s needs and interests.

2. Engagement Strategies

  • Community Engagement: Respond promptly to comments, queries, and feedback from your audience across various platforms, including your website’s comments section, social media, and emails.
  • Newsletter Campaigns: Use newsletters to keep subscribers updated with new content, promotions, or relevant industry news. Encourage sign-ups and offer exclusive content or discounts.

3. Social Media Interaction

  • Active Presence: Engage actively on social media platforms to foster relationships with your audience. Share your content, respond to comments, and participate in discussions.

4. Continuous Improvement

  • A/B Testing: Experiment with different layouts, CTAs, or content formats through A/B testing to optimize for better user engagement and conversions.
  • User Feedback Incorporation: Use insights from user feedback, comments, and surveys to make informed decisions about website improvements.

Regular maintenance, data-driven optimization, and active audience engagement are crucial for the sustained growth and success of your WordPress website. Continuously refining and updating your site based on analytics and audience interaction will ensure its relevance and performance in the ever-evolving digital landscape.

Conclusion

By following these steps, you can create a fully functional WordPress website tailored to your specific needs and preferences. Remember, WordPress offers a lot of flexibility, so don’t hesitate to explore and experiment to make your website truly yours.

Let's Collaborate!

Bring your brightest, boldest ideas to the table. We’re building a community of open minds and shared inspiration. No idea is too big, too small, or too wild – let’s unlock the next big thing together.

So, what are you waiting for? Share your ideas with us!